Git Providers
How to Set Up Git Provider Integration
This guide explains how to integrate your DevPortal with a Git provider (such as GitHub, GitLab, or Azure DevOps) to facilitate catalog import and project generation.
Steps
Step 1: Access Git Provider Settings
- Open Admin UI: Access the Admin UI of your DevPortal.
- Navigate to Git Providers:
- Click on "Go to settings" in the menu.
- Select “Git Providers” from the sidebar menu.
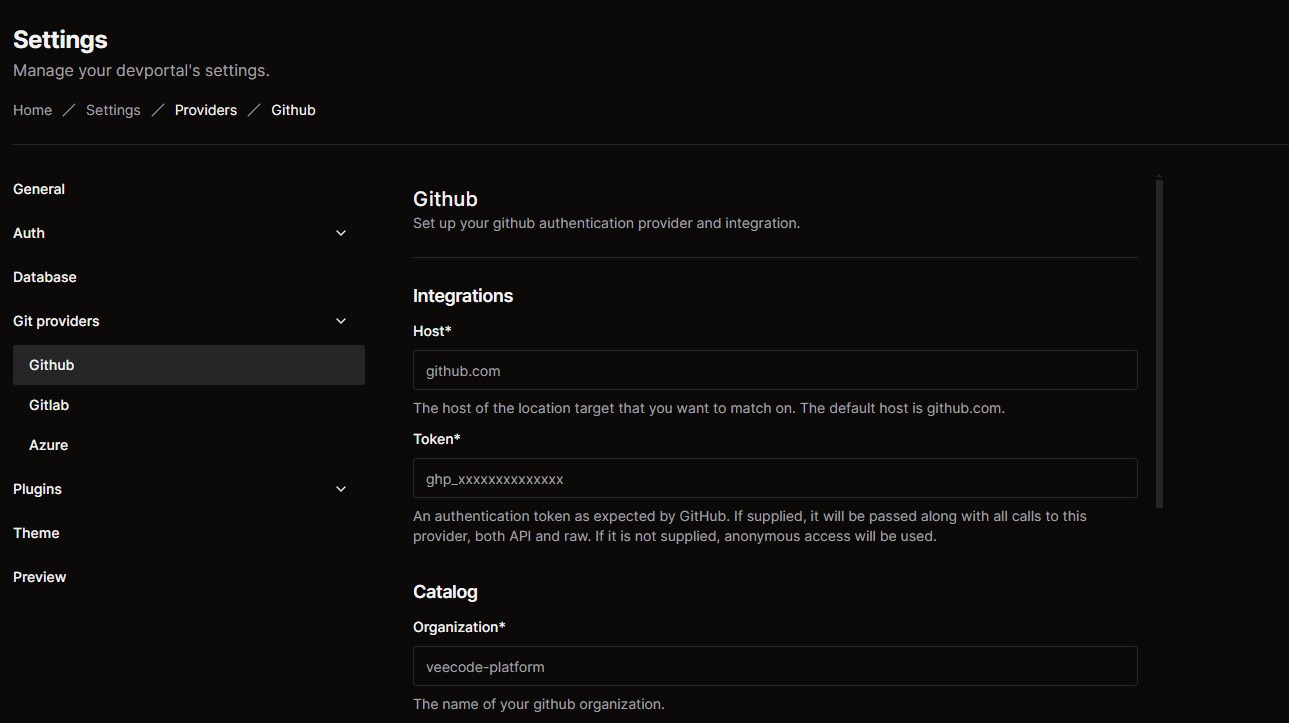
Step 2: Fill in Git Provider Information
- Enter the Required Data:
- Complete the fields based on your chosen Git provider (GitHub, GitLab, Azure DevOps). Below is a table with a description of each field:
| Field | Description |
|---|---|
| Host | The host location. Default is github.com. |
| Token | Authentication token for API and operations (anonymous access if not provided). |
| Organization | The name of your organization on GitHub. |
| Catalog Path | Path to the catalog-info.yaml file. |
| Branch | The branch you wish to use. |
| Repository | The repository you want to integrate with. |
| Frequency | Time (in minutes) for catalog update intervals. |
| Timeout | Time (in minutes) to automatically terminate after update requests. |
| Client ID | Your Client ID from the GitHub account. |
| Client Secret | Your Client Secret from the GitHub account. |
warning
For the full integration and operation of the DevPortal with GitHub, you should create and configure your authentication application(GitHub Oauth) and add the host that has been provided to you in the EC2 console. To configure your GitHub Oauth integration, please follow this step-by-step guide
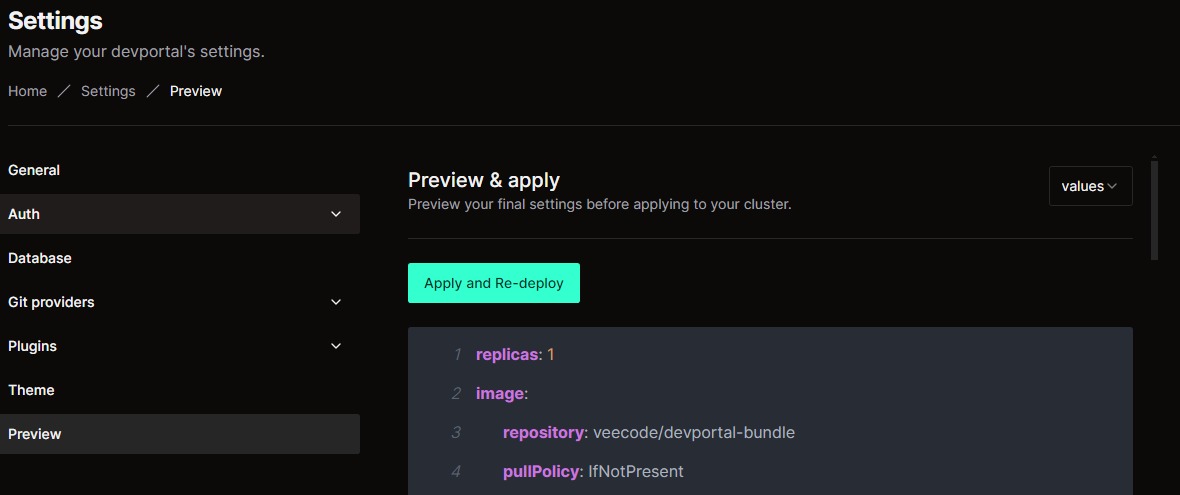
Step 3: Preview the Configuration
- After filling in the required fields, click on "Preview" in the left-hand menu to review the information.

Step 4: Apply and Redeploy
- On the Preview page, verify the information, then click on "Apply and Re-deploy" to apply the new Git provider settings and redeploy the application.
Additional Important Information
- For complete integration with GitHub, you will need to create and configure a GitHub OAuth application.
- Add the host provided in the EC2 console when setting up the GitHub OAuth.
- Follow the detailed GitHub OAuth configuration guide to complete the setup process.
| Field | Description |
|---|---|
| Host | The host of the GitLab instance. The default host is set to ‘gitlab.com’. Please note, it’s important not to include ‘https://’ or ‘http://’ in your input. |
| Token | An authentication token as expected by GitLab. The token need at least api, read_repository and write_repository scopes. If this is not supplied, anonymous access will be used. |
| Client Id | Your GitLab clientId. |
| Client secret | The URL of the GitLab API. For self-hosted installations, it is commonly at https://host/api/v4. For Keycloak.com, this configuration is not needed as it can be inferred. |
| Api base url | The URL of the GitLab API. For self-hosted installations, it is commonly at https://host/api/v4. For gitlab.com, this configuration is not needed as it can be inferred. |
| Branch | The branch you want to use. |
| Group | Group and subgroup (if needed) to look for repositories. If not present the whole instance will be scanned. |
| File name | Catalog file path. |
| Frequency | Time in minutes for catalog update. |
| Timeout | Time in minutes to timeout after the refresh request. |
During this step, we will configure AzureDevops as the authenticator for the platform.
| Field | Description |
|---|---|
| Host | The host of the GitLab instance. The default host is set to ‘gitlab.com’. Please note, it’s important not to include ‘https://’ or ‘http://’ in your input. |
| Token | An authentication token as expected by GitLab. The token need at least api, read_repository and write_repository scopes. If this is not supplied, anonymous access will be used. |
| Api base url | The URL of the GitLab API. For self-hosted installations, it is commonly at https://host/api/v4 |
| Branch | The branch you want to use. |
| Group | Group and subgroup (if needed) to look for repositories. If not present the whole instance will be scanned. |
| File name | Catalog file path. |
| Frequency | Time in minutes for catalog update. |
| Timeout | Time in minutes to timeout after the refresh request. |
During this step, we will configure Keycloak as the authenticator for the platform.
3.After filling out the necessary information, click on “Preview” in the left-hand side menu.
4. On the preview page, you can view all the set information and redeploy the application to upload the new settings. To do this, simply click on "Apply and Re-deploy".